Free Redbox Code Free Printable Christmas Tag


Are you needing a quick gift for your neighbors, teachers, friends, and family? Did you wait until the last minute like I always do! Our family loves movies! I love the idea of a movie night because it brings the family together or is a great date night!

I give a Redbox code(or more!) to each of my child's teachers. It is an inexpensive way to show your appreciation and it makes a very quick and easy gift! Go to the Redbox website and purchase however many codes you need. I have them sent to my own personal email. Simply print the tags and write one code per tag. There are 6 tags per page to save paper and they fit very nicely into an envelope!

I write a quick thank you card or message and insert the Redbox code tag into the envelope. You can go one step further and attach it to a bag of popcorn and candy. Or make a movie night gift basket. There are tons of ideas on Pinterest. I don't want to get the wrong candy so I opt to give more codes than spending that money on candy!
There is a color version as well as a black and white. You could even have your child color the black and white version before giving!

Redbox Code Free Printable

Click the picture or here to download this FREE printable!

I hope you enjoy and have a blessed Christmas! :)


Mrs. Cain's Favorite Things


Our favorite math things! Did anyone else run home to watch Oprah at 4:00 after school? I can literally remember being so excited to see Oprah's "Favorite Things" Christmas episodes and dreaming about having all of those things. I think we all have favorite things that we use every single day in our classroom and/or at home as teachers. Here are a few of my favorite things!

1. Favorite Holiday Activity
Sugar Cookies! I grew up sitting around the table with all my cousins making a giant mess of sprinkles and eating way too much sugar. My mom would make the sugar cookies from scratch and we would have fun using all the cookie cutters to make the perfect cookie(and sneaking some raw dough). She would then let us use icing and sprinkles galore! I know for a fact there was finger licking involved so germs were definitely being spread! My uncle would eat them anyway! On a side note, I actually do not even like sugar cookies as I am more of a pecan chocolate chip/oatmeal raisin type girl. But, I love the experience! I think this is the most important part to remember-experiences.
I am a work smarter, not harder type of mom so here are my shortcuts:

1. Buy sugar cookie dough in the rolls. I love Pillsbury!
2. Buy a couple cookie cutters from the holiday section at Walmart(they are like 97 cents). Don't go overboard. You just need a few!
3. Buy ready-to-spread icing and divide into some bowls. Let your kids count how many drops of food coloring they have used and watch as the colors change with the addition of drops.This can become a great ratio and art min-lesson!
4. My mom had a great idea to put sprinkles into cupcake liners in a cupcake pan to *hopefully* eliminate dumping of sprinkles. I told my kids to use their fingers(after we washed our hands) to get sprinkles onto the cookies.
5. Enjoy the experience! I put down towels on the floor for easy cleanup and let the kids eat a cookie(or two!). My dog licked up any fallen and left behind sprinkles. Have fun with it!

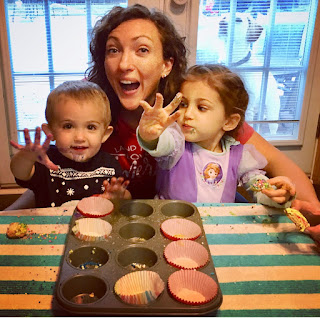
Showing off our icing and sprinkle fingers! See our dog Stella in the background?
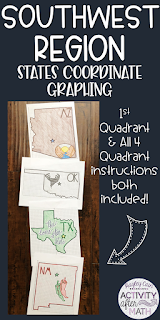
2. Favorite Math Activity
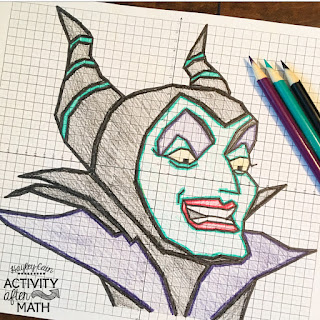
I love, I mean LOVE all my Christmas math Coordinate Graphing Mystery Pictures. It never fails that I have students that need a refresher with the coordinate plane. We have so many standards in eighth grade that use the coordinate plane that it really is tied with my curriculum. I use my mystery pictures as a decoration as well! These make fabulous sub plans, early finisher activities or extra credit for the end of the semester. Here are two of my favorites. Click the picture to get these for your students!
Christmas Math Coordinate Graphing Mystery Picture

Christmas Math Coordinate Graphing Mystery Picture

I also love my Math Movie Questions to accompany the movie Elf, Frozen, or How the Grinch Stole Christmas. These are all standards aligned! This is a great way to have your students doing math while rewarding them with a movie!

3. Favorite Teacher Tool
Y'all! I just recently started playing around with using Google Forms to help me give feedback to my students quicker and it has been amazing! Students can use their own devices to do this! Even if you are limited with technology and are not a 1:1 school(we are not!), you can use Google Forms to create a "quiz". You can even assign feedback for incorrect answers! If you assign point values to each question it will grade it for you! Go to the settings on your Google Form and click the tab titled Quizzes. Choose the settings you want and go back to your Form to assign the correct answers and point values. I have done this with plain worksheets so I can get immediate data in one class period. This helps me see quickly who needs remediation and who needs an enrichment activity!
*Be on the lookout for a blog post soon about more details on how to make any worksheet into a Google Form Quiz!
Another favorite teacher tool is the obvious-FLAIR PENS! I thought everyone knew about these special little gems but it is still widely not known how amazing these pens are. I use them to fill in my guided notes during class, grading papers, and pretty much everything else. See below to win some for your own classroom!

→GIVEAWAY details:
I am giving away a $10 Teachers Pay Teachers gift card(will be sent through email) AND
a 12-pack of FLAIR PENS(will be sent through Amazon) to ONE awesome teacher!!
1. Simply like my Facebook Page
2. Comment on this Blog Post with one of your favorite things!

Now it's time to hop on over to Middle School Math Man's Blog to enter another giveaway! 
**Giveaway end Monday, December 18, 2017 at 8:00 P.M. EST!**


Comfort and Joy in the Secondary Math Classroom


I am excited to be a part of the 12 Days of December Blog Hop and Giveaway! I have teamed up with some incredible secondary teachers to write about "comfort and joy" during the holiday season in our classrooms. 


Christmas Time!! I love seeing Christmas decorations all around town and views into people's homes on Instagram. I know that many of our students do not get to experience holiday decorations in their our home for various reasons. Our family is spread out in different states so during the holidays we are on the go and traveling for a lot of our break. How can we be sure to spread "Comfort and Joy" to our students through our classroom? I know that having a decorated classroom brings me some comfort when I am at school.
I know that in a secondary classroom we might not want to have a "cutesy" theme for holidays. I am going to share some ways that I *hope* to bring comfort and joy into my middle school math classroom.

1. Music
Y'all! I love Christmas music! Mariah Carey Christmas CD anyone? Take me back to 5th grade! I feel like music always brings the level of noise down in my classroom. I can say, "If I can't hear the music, it is too loud..!" I like that my students can talk with each other but with 30 kids in one classroom it can get really loud sometimes. I put on Pandora! My favorite station for Christmas music is Michael Buble and Mariah Carey mixed.

2. Christmas Lights
This is one of the easiest ways to bring some joy into the classroom. I have asked neighbors and parents to donate their old strings of lights and you would be surprised at the donations! I will accept any colors of lights(even if there are some parts with broken lights!). I love hanging lights from my ceiling and have left them up from year to year. You could also hang the lights around your front whiteboard or even your classroom door. Here is an example of a gorgeous Christmas Wreath, made with deco mesh(which is super cheap!), from my coworker Kristina! Click here to check out her TpT Store for more math ideas!


3. Christmas Trees
I love putting my tree up at home and I love the idea of having a tree in the classroom. We are at school for at least 8 hours a day...
Here is a great small tree idea from my coworker Kim! Click here to check out Kim's blog for secondary ELA ideas!

You could also get a small 3 ft. tree that you decorate. Give students the responsibility of watering each day.

*If the fire code does not allow you to have Christmas lights check out Hobby Lobby or Big Lots for those cute colored fake trees. These would last from year to year and require no maintenance.

4. Math Themed Decorations
I feel like sometimes it can get a little hectic around the end of the semester. I love my coordinate graphing mystery pictures for this reason. When I need something for my students that is still tied into the curriculum, I pull out my Christmas Mystery Picture. These are fabulous for decorations!


5. Christmas Movies
If you feel like you may need a break from the routine, then bust out some classic Christmas movies. I have Math Movie questions to go along with Elf  and How the Grinch Stole Christmas or Frozen so your students will never know they are working on math while watching a movie!

6. Create Christmas Cards 
I am an artsy person (maybe should have been an art teacher), and I love doing my String Art project! It is very student-led and students can go crazy with their ideas. Here are some past examples that are amazing! 


You can create "snowflakes" for the front of a card. Hang these in your classroom as well for more decorations! Click here to get this project for your students

I hope you, your family, and students all have a wonderful December and enjoy your break! 
Don't forget to check out all the amazing secondary bloggers sharing their ideas to help you bring "Comfort and Joy" into your classroom and be SURE to enter our GIVEAWAY! There will be gift cards raffled off on December 1st, 4th, 8th and 12th. Enter early and often for your chance to win some crazy prizes! Merry Christmas!

a Rafflecopter giveaway

Secondary Halloween Activities

I love the fall! I am definitely a fall clothes kind of girl (but I love summer weather!). It is still over 85 degrees down here in the South so fall clothes won't be coming out anytime soon.
One thing I do love to do is decorate my classroom for Fall! I have a super simple wreath I made for my classroom door. I'm better at changing out my classroom door hangers/wreaths than I am at my own house. Step 1 is to duct tape a foam tube or pool noodle together. Wrap ribbon or strips of fabric around and hot glue every now and then to hold it down. Hot glue some flowers to the edge and tie a ribbon onto the top. I got the glitter Spooky hanger at Hobby Lobby. Super easy wreath that will last me years!
I did an easy spiderweb design over one of my eyes last year for Halloween. This is a super easy way to add some Halloween Flair as a teacher! Use some darker eye-shadow on your eyelids and then draw the spiderweb onto your eye, forehead, and cheeks with eyeliner! Draw the lines spiking out first and then connect with the curved lines. My sweet boy was a pumpkin last year! 


October can seem pretty busy with Homecoming football games, Red Ribbon Week, Fall Breaks, Writing Tests, Parent Conferences, Incentive Days, etc. One thing I like to have for these days that seems to have a constant interruption is my Coordinate Graphing Mystery Pictures. I have three different ones that work great for students and the fall. I had a student request that I create Jack from the movie The Night Before Christmas (which is now on Netflix! *as of 10/7/2017). This is not an easy mystery picture and is one of my more challenging pictures. This picture would work great for your higher-level learners or high-school students.
Click here to get this for your students!

I also loved the Movie Maleficent! This witch is a perfect fit for Halloween. If you need emergency sub plans or something to have as a reward for students you can check out my Math Movie Questions to accompany the movie Maleficent. Click here to check those out!  I also have a Witch Coordinate Graphing Mystery picture that goes great with the movie as well!
Click here to get the Witch Mystery Picture

One of my favorite Coordinate Graphing Picture is my Monster which is perfect for Halloween. Click here for my Math Movie Questions to accompany the Movie Monsters, Inc. 
Click here to get the Monster for your students!

I hope you and your students have a fa-BOO-lous Halloween!

Cross-Curriculum State Coordinate Graphing Mystery Pictures

Learning about the United States in History? Learning about the different mountain ranges in Science? Studying types of poems in Language Arts? Historic songs in Music class? Graphing in Math?

We all want to incorporate other content areas with the one that we teach. In secondary classrooms, it can feel extremely difficult to plan big units that have standards tied together from all four subjects (or more!). I love to create coordinate graphing mystery pictures and I have a really fun and easy way to integrate all the subject areas with each other.
For each state students will graph points on a coordinate plane and it creates an outline of the State. There is also a star on the state Capital and the state's abbreviation. The clever title of the state's nickname gives them a clue to what the picture will be. 
The points include ordered pairs with decimals such as (10, 4.5) and (-0.5, 1.75).
For each version:
--A colored example of the finished picture.
--Student Instructions with the ordered pairs.
--A graph with the numbers and x- and y-axis labeled. 
--A graph with the fractional grid lines labeled as well.

It is easy to print the points on one side and the graph on the back side to save paper! This is a great beginning of the year activity, End of the Year, Substitute, "filler days", early finisher activity, and anchor activity! 
This is hand drawn, not computer generated, so the points graphed work out exactly as the picture looks! 

Options for using this resource:

  • States Grab Bag Option
  • Pen Pal Letters
  • Military Base Get To Know You Activity
  • Early Finishers
  • Emergency Substitute Plans
  • Anchor Activity
  • End of the Year Activity
  • Constitution Day
  • US Geography Class Collaboration
  • Bulletin Boards
  • American Revolution Unit of Study
  • Great Mail Race Lesson
  • States and Capitals Unit
The following is an example of how you could use the FREE version of the United States Coordinate Graphing Mystery Picture in your classroom!
Students could graph the ordered pairs in Math class and take it with them to their other classes to continue the integration. In Language Arts, the students could write a poem about what they have learned in their History class. The students could use the outline of their Mystery Picture, they have graphed in their Math class, as a template for their poems. Students may be studying about historic songs and their backgrounds in music class and learning about poems in Language Arts. 
 United States Coordinate Graphing Mystery Picture FREEBIE
The States have been bundled into the FIVE REGIONS as well as one GIANT bundle of ALL 50 States. Click each picture below to check out the different options! 
I hope you and your students enjoy them as much as I enjoyed creating them! 
 West Region States Coordinate Graphing Mystery Pictures BUNDLE
 Southwest Region States Coordinate Graphing Mystery Pictures BUNDLE
 Southeast Region States Coordinate Graphing Mystery Pictures BUNDLE
 Northeast Region States Coordinate Graphing Mystery Picture BUNDLE
 Midwest Region States Coordinate Graphing Mystery Picture BUNDLE
I'd love to see pictures of your students' work! You can email me at activityaftermath@gmail.com or tag me on Instagram @activityaftermath


Easy tutorial on making DIY paper rosettes

If you are here from my previous post about making an awesome bulletin board for your school, I promise I will be quick! If you missed the post on the bulletin board click here!


How to make paper rosettes:
Step 1: Get some paper. I found many tutorials that said you need a square size, but that is wrong. I used regular copy paper. It would probably be sturdier if you used cardstock but any paper will work!

I used Astrobrights Brand Colored Copy Paper. Click here or the picture below for an affiliate link.

I think the best way is for there to be multiple sizes and layers so it is dimensional. It draws your attention! I used the same color paper that I used for my bulletin board letters. It takes three pieces of paper to make a "tighter" rosette but for some of the smaller version I only used two pieces.

Step 2:
If you are starting with a rectangular piece of paper you will fold up the long side. If it's a square, it doesn't matter which side you start on. Flip the paper over and continue folding on top of the previous fold until you have finished the entire piece of paper.


Step 3: 
Fold that paper in half. You will need three of these.

Step 4:
You have now made V shapes with your three pieces. You will tape the inside pieces together. You could also use a dab of hot glue, glue dots, double-sided tape, a stapler, etc. You get the point. I couldn't find my hot glue gun so tape it was. :)

Step 5:
Now take two pieces and tape their outside edges together. You are almost finished! Grab that third piece and tape those outside edges together connecting and making a circle! 

Since I used regular paper and not cardstock, they seemed a little flimsy. I did hot-glue an index card on the back in the center to help stabilize it when I put them together for the bulletin board. I just did a quick layout on my dining room floor of how I wanted them to look and snapped a quick picture so when I am hot-gluing them up on my bulletin board I can have a reference. I've also seen where you can get poster board and have that as your starting point for gluing onto. 


If you'd like to have the Hashtag Bulletin Board Kit click here! 


That's it! You are finished! Now go make tons more so you can have a collage of paper rosettes that make a great backdrop! I'd love to see your versions if you make a bulletin board! You can tag me on Instagram @activityaftermath.


How to Make an AWESOME #Hashtag bulletin board!

There are some great back to school signs out there for those #firstdayofschool moments with your children and/or students. I thought why can't we make these for our middle school students? I can't say I have a first day of my eighth grade year picture anywhere(nor do I think I even want to see one! Yikes!). This is a great way to use a bulletin board in the hallway or commons area for students to use as a backdrop for their pictures! Get one of each of your students and let them take some pictures with their friends! This will be up for Open House night so my students can even have their parents take their picture with them!


I printed these letters out on gorgeous Astrobrights paper. I like that it was already a theme of colors that are coordinated. I couldn't go wrong here. I alternated colors because I like the way it looks. You could do one solid color paper. We do not have color printers and I don't want to spend the money to get them made so this is a cheaper alternative!   


The next step is to cut out those letters! Take your time. Trust me. You don't want to cut too much off. I like to leave a small sliver of colored paper on the outside of the black lines.
Next is to laminate! *This is also optional! I sometimes don't have time to laminate so I simply staple the letters right up knowing I won't be able to use them again next year. If you want it to last-laminate the letters! 

Be sure to lay out your letters on your floor or a counter to be sure you have everything spelled out (correctly!) and it looks how you want.


I am using a navy fabric to back my bulletin board. This will prevent fading from the sun or students writing something on the butcher paper. Be sure to measure your bulletin board's length before you shop. Most bulletin boards are 4 feet tall. Fabric is usually 45 inches wide. You can see that the edges of the fabric at the top are jagged. This works because you will cover the gaps with your border. I did a double layer of border to add dimension. I simply hot glued the solid border to the silver edge of the bulletin board! *Forgive the bad lighting!

Staple your letters up high enough so if students are standing in front of the board it will still show in the picture.

Staple your letters onto the top portion of the board! Add a side decoration and that is it!

I chose to do lots of paper rosettes in the same paper I printed the letters on to match and have a large decoration off to the side. I have seen these online and in craft stores already made. I took the long route and made my own. Click here for the EASY tutorial on how I made my paper rosettes. 


That’s it! You are done! I’ve made a hashtag for each grade level as well as a few others. Click here for the Hashtag Bulletin Board Kit. 

I'd love to see your completed bulletin boards! Tag me on Instagram @activityaftermath